1. Add fonts
Did you know that you could add new fonts into your Google Docs font library?
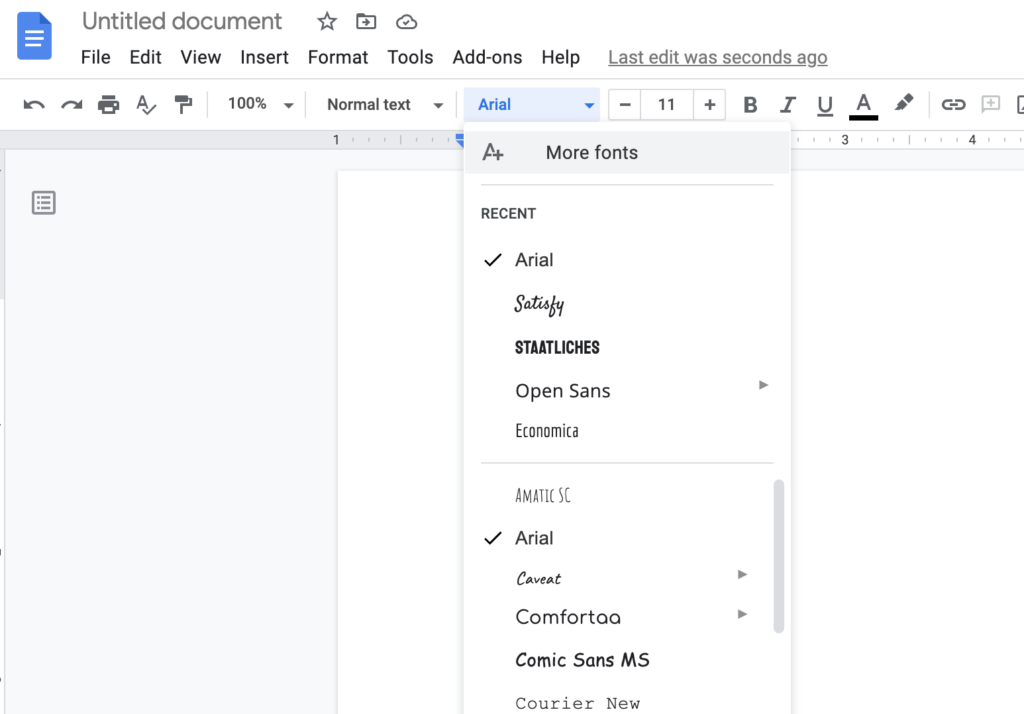
In a document, click the font field. At the top of the drop down, click “More fonts.”
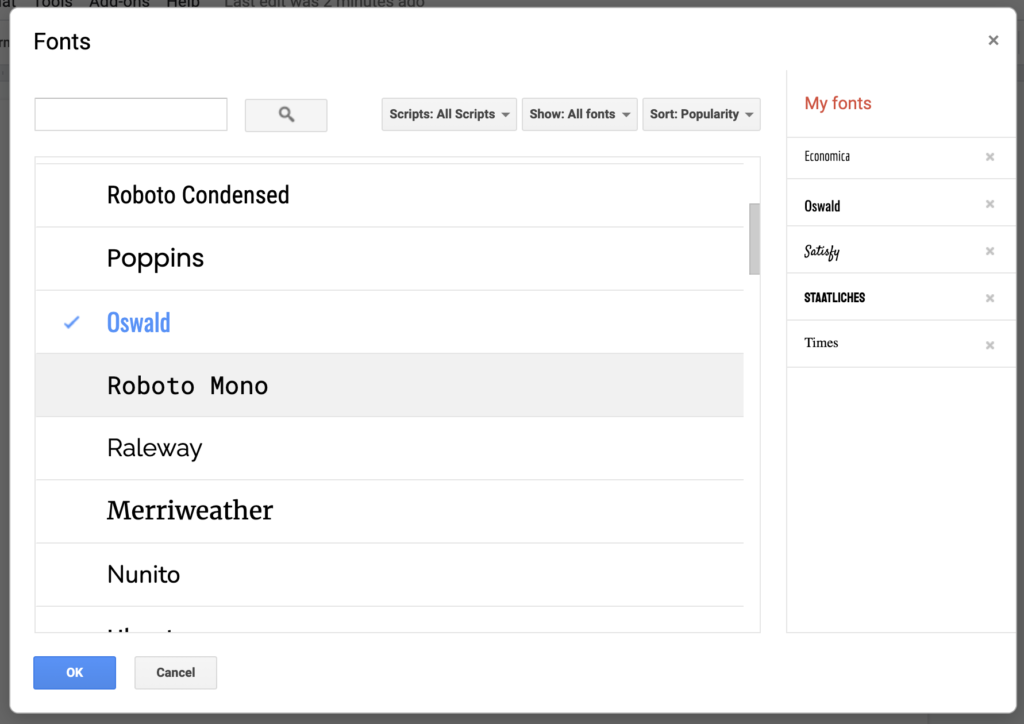
Use the drop down menus across the top to filter font styles and select the font that you wish to add to your library. Once you have selected the font that you would like, click the blue OK button. The font should now appear in your list of fonts.
2. Templates
You probably knew that Google Docs has ready-to-use templates, but they are still often overlooked. These templates can come in handy for several different uses.
When you open Google Docs you’ll see several templates at the top of the page. To view even more, click, “Template gallery.”

Here you’ll see template options for work, sales, legal, human resources, letters, resumes, education, and more.
3. Clear Formatting
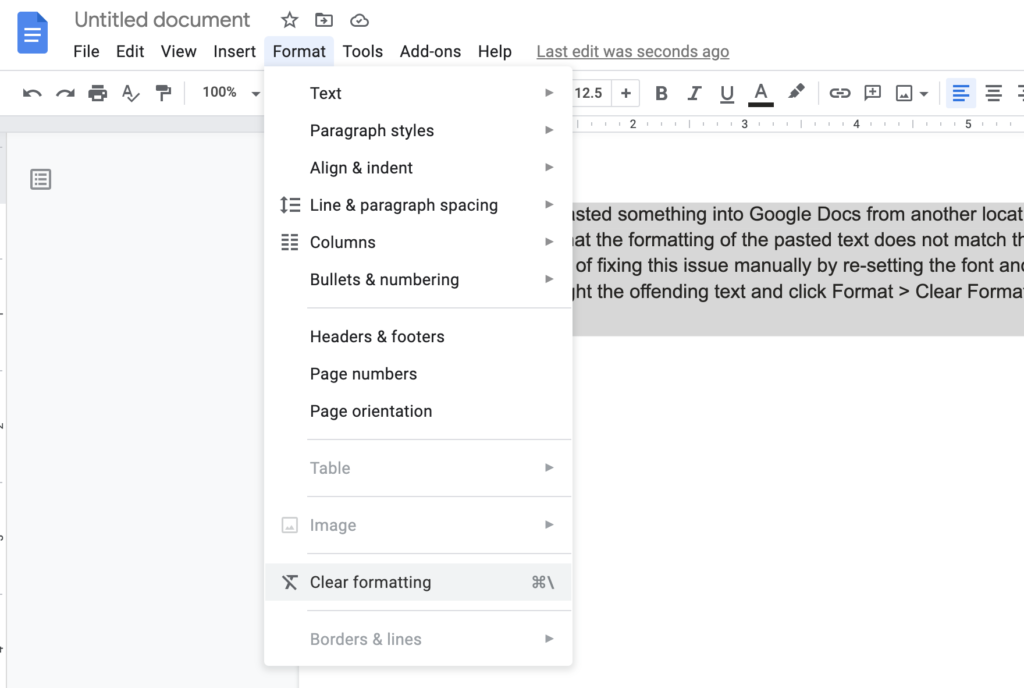
If you have ever pasted something into Google Docs from another location, you probably noticed that the formatting of the pasted text does not match the rest of the document. Instead of fixing this issue manually by re-setting the font and font size, you can just highlight the offending text and click Format > Clear Formatting.
4. Explore Tool
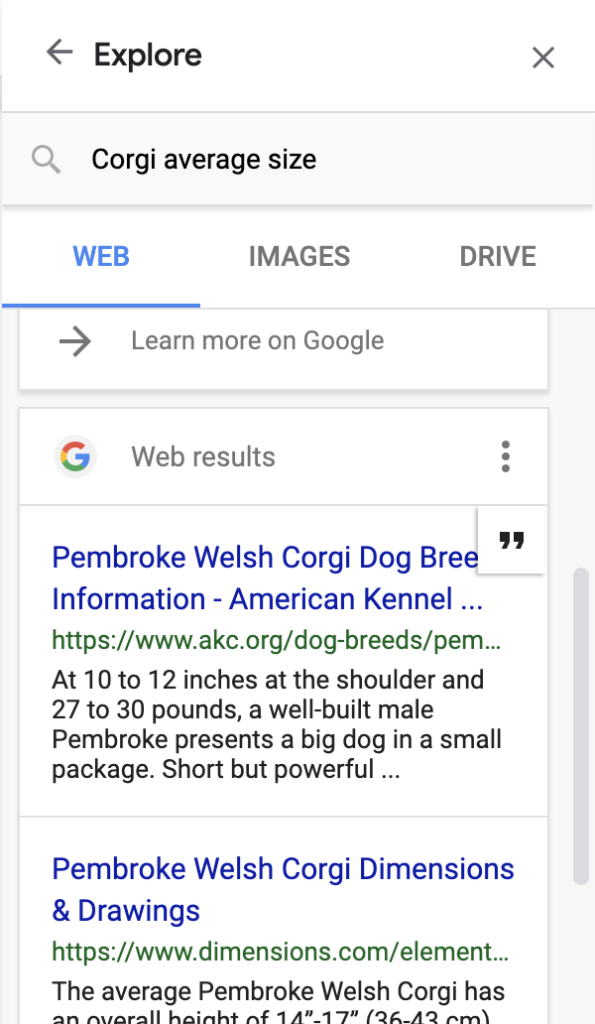
Have you ever noticed the Research tool? Basically, this tool allows you to do online research and refer information or images you find back to the source without ever having to leave Google Docs.
There are several ways you can open the research tool on a computer.
- With your document open, go to Tools > Explore.
- Right-click on a specific word in your document and select Explore.
- Press Ctrl + Alt + Shift + I (PC) or Option + Cmd +Shift + I (Mac).
After you’ve explored and have found the source you would like to use, you can click the quotation symbol and it will automatically add a reference number to lead the reader to the footnotes.

5. Suggesting Mode
Similar to Comments in Microsoft Word, the Suggesting mode in Google Docs allows you to make a suggestion for change without actually changing it. You can change from Edit mode to Suggesting mode by clicking the pencil icon at the top right corner of your open document.

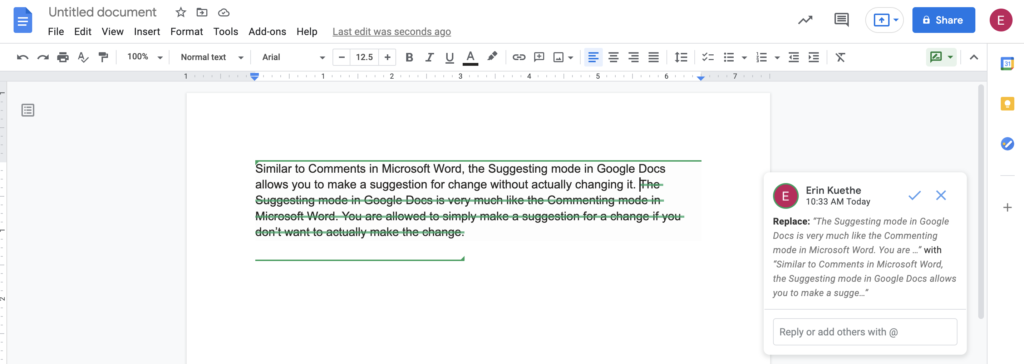
If there is a suggestion you would like to either accept or reject, click the checkmark or X respectively. This will change the text in the document according to what is clicked.
6. Add footnotes
The footnote feature can be really convenient when you need to credit a source for a piece of information. To add a footnote, simply click to place your cursor in the location you need the reference number for the footnote. Go to Insert > Footnote. Then type in what you would like for your footnote.

7. Version history
Have you ever been in a situation where you wish you could go back to an earlier version of your Google Doc? Or maybe just wanted to see a log of who’s been editing the doc? You’re able to with Version History. With your document open, go to File > Version History. There will be a panel on the right-hand side that shows an overview of when changes were made and by whom.
8. Keyboard shortcuts
Keyboard shortcuts can sometimes be quicker than selecting things with your mouse. Especially when you’re in the middle of typing something and already have your hands on the keyboard. Conveniently, there are several keyboard shortcuts you can do in Google Docs. Besides the basic, Ctrl + C (PC) or Cmd + C (Mac) to copy, or Ctrl + B (PC) or Cmd + B (Mac) to bold, there are many other keyboard shortcuts that may be especially convenient.
For PC:
- Ctrl + k = Insert or edit link
- Ctrl + f = Find
- Ctrl + h = Find and replace
- Ctrl + Enter = Insert page break
- Ctrl + a = Select all (text)
For Mac:
- Cmd + k = Insert or edit link
- Cmd + f = Find
- Cmd + h = Find and replace
- Cmd + Enter = Insert page break
- Cmd + a = Select all (text)
